In the past few weeks, more than one person has asked for help updating their art department workflow. There have been so many technological, social, and methodology changes that the old notion of the “art department” needs to be overhauled. For many, it is just not working.
Why? Because you have tools like ChatGPT and Midjourney. Many art departments are outsourced to Virtual Assistants, companies like seps.io, freelancers, or employees who sometimes live hundreds (if not thousands) miles away. The need for the work hasn’t changed. The “how” it is being performed certainly has.
Breaking Down Art Department Steps
Let’s look at the workflow from an overview perspective. While companies may have different needs, most work this way.
- Order Information – This is generated when the sale is made. It is the basic set of facts regarding the order. Customer information, garment color, fabric type, decoration locations, decoration size, decoration method, colors per decoration location, production date, plus any other information regarding the order.
- Design Information – This can sometimes be sketchy, especially with shops that are not process driven. “Do something cool” is not a good set of instructions to the art team. Rampant design changes are often caused by misalignment with the customer on what is requested.
- Art assigned. The order and design information is relayed to the art team. There may or may not be a process on “when” the art will be created. When the art team gets backed up, this can cause a domino effect on production, and their work will also be late.
- Art sent for approval. After the art is completed, it is sent to the customer for approval.
- Art changes. Customers either approve or disapprove the art sent. When the customer requests changes, this work delays new jobs from going out.
- Art approved. After the customer approves the art, the files are separated or queued for production, depending on the decoration method.
- Art exploration – There is a need to create new art techniques and explore ideas. This could be for customers, or for developing skills in the shop. This is mostly handled whenever there is some breathing room. Which means that it almost never happens.
Accelerating the Work
The seven points above are oversimplified a little bit, but you get the idea. Whether you are creating art for screenprinting, DTG, heat press transfers, laser engraving, embroidery, or promotional products the steps listed above are primarily how work is being done.
Sometimes the art is easy. Just take a company logo, size it to fit, and maybe add some text. Sometimes it is incredibly difficult, with vague instructions.
Let’s take a minute and step back and look at each facet of the workflow to revamp how things could work to accelerate the output using what’s available to your team.
Step 1 – Information
Whether your in-house team is developing the file, or you have a freelancer, outside agency, or virtual assistant, they need accurate and complete information to do their job correctly. Your goal (and you should be tracking this as a KPI) is to have 85% or better customer approvals the first time they are sent the document to review.
When you start tracking the reasons why customers don’t approve the art, you can start to see patterns. These are opportunities for improvement with your art department. Challenges could stem from a lazy salesperson, an artist that doesn’t comprehend what’s needed, lack of information being gathered, or even a client that always has to stick their thumb in something and make a change.
Solution:
Use an information capturing system such as Google Forms, Jotform, Typeform or other services to create an “Art Intake Form.” Have manadatory questions that require answers. The role of the form is to eliminate the “I forget to ask” portion of creating a solid creative brief for your art team. This can be branded and also use conditional logic so that the questions asked are based on the decoration method. This can be filled out by your salesperson, or by your customer.
Your creative team needs the best and most accurate information possible to be able to create the decoration for the order. They need your help. One of the most common logjams in the industry stems from getting art created and approved. Mitigate the issue by ensuring the information stream is perfected.
Step 1a – Information Mining
It is not uncommon for art teams to have the task of developing great ideas for your customer. After all, that is a good chunk of your value proposition, correct? This can be a slow and arduous task sometimes.
The good news is that you can harness the power of artificial intelligence to help with this chore. As an example, let’s say that a local bank has come to you to create the merch for an upcoming charity event. It is a new event and the bank will be hosting a pancake breakfast at the local town square park. They want to see what you can do. After all, you are the idea person…right?
In under one minute, ChatGPt produced twenty t-shirt headlines. Let’s pick “Sunshine Stacks” as the winner. Not everyone is a good copywriter. Using a tool like ChatGPT to augment your creative team could accelerate this part of the process.
Putting the Pieces Together
Now comes the fun part. Putting everything together.
I’m an old school guy and I like to plan. If you want to create faster, the first thing you need is a thumbnail sketch. Newer artists in the industry go straight to the keyboard, but I’ve found if you want to considerably reduce the amount of time developing art for clients, a thumbnail is the way to go.
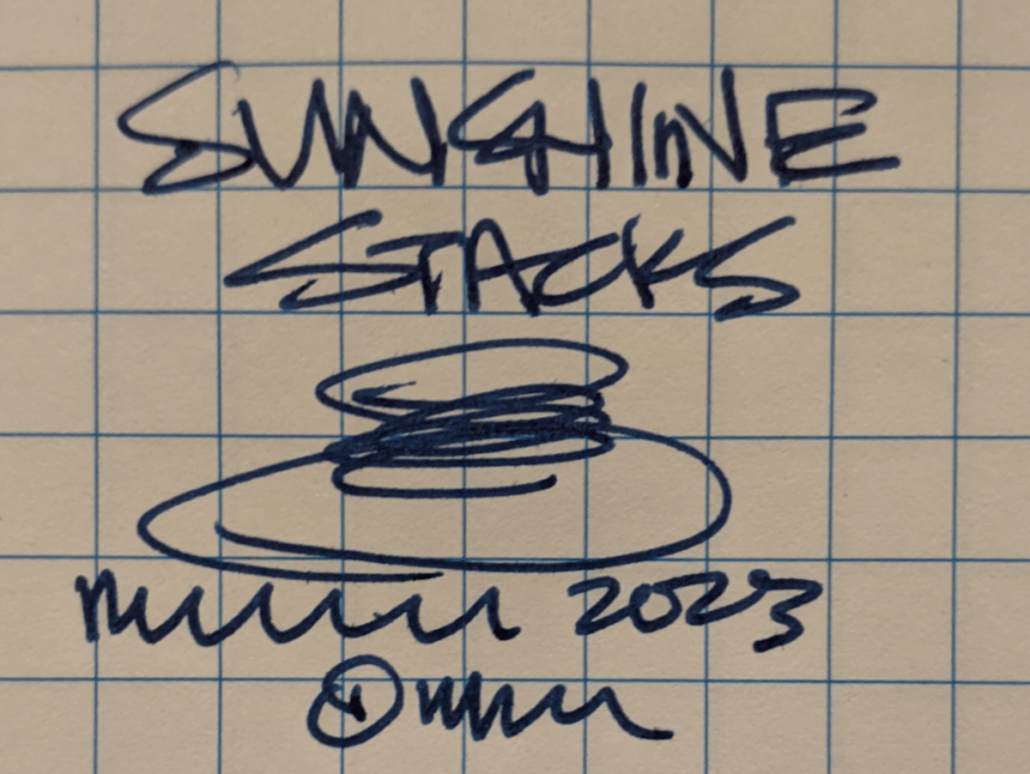
Art Creation with a Thumbnail
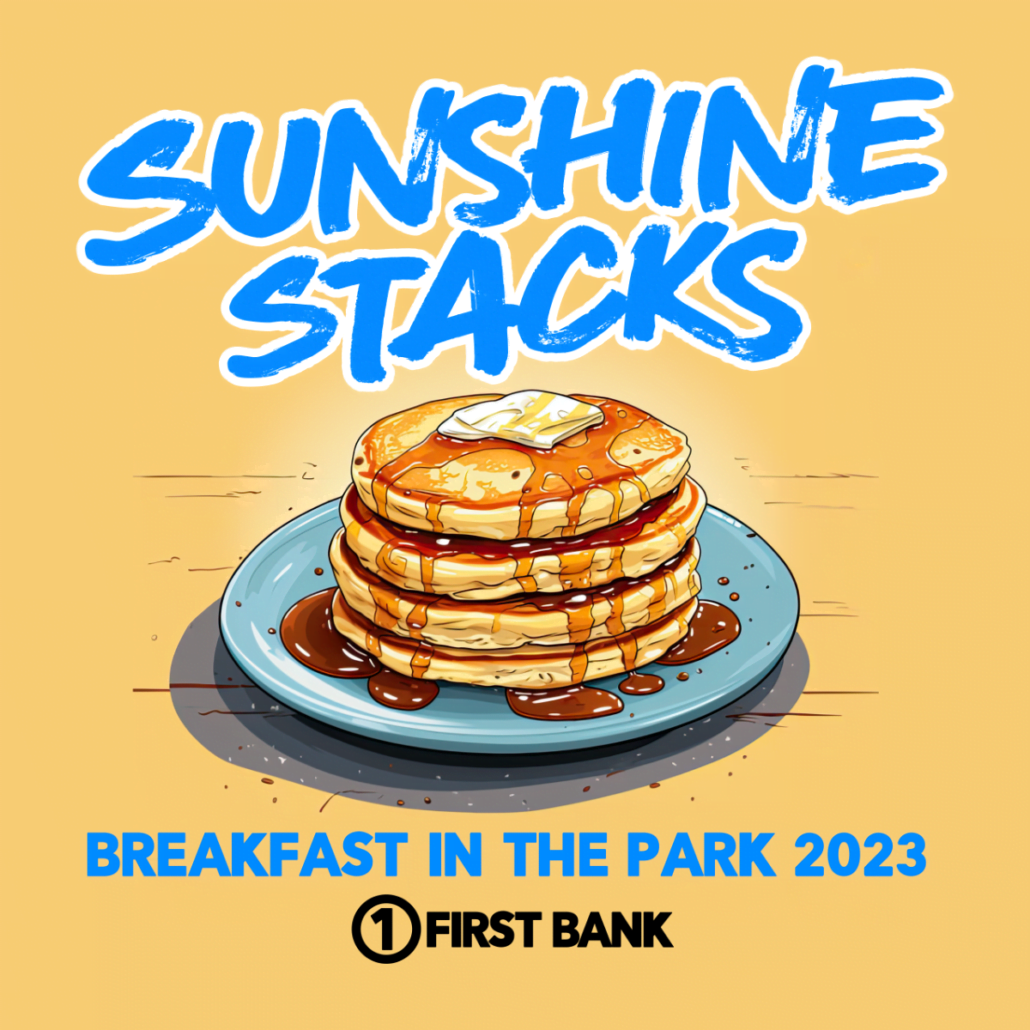
Here, we are using the phrase “Sunshine Stacks” as the headline. A pancake image will be underneath, with the “Breakfast in the Park 2023” text underneath that to give the image a foundation. The sponsor logo goes underneath everything.
You can doodle up as many of these as you want. If you have a picky client, you can even shoot them a few to check the layout before you start building out the file. Maybe they want their logo on top? Knowing this before you construct the artfile and send it out for approval can decrease the amount of changes needed later.
You’ll also notice that I’m not spending any time at all trying to make the type or the pancakes look realistic. This is only for major shapes, alignment, and placement. When we are building the file later is when we’ll be concerned with that notion. This took less than a minute to create.
To recap…we spent one minute in ChatGPT and another minute to create a thumbnail. That’s two huge pieces of the puzzle knocked out.
Using Midjourney for the Image
Now that we have the headline chosen, we can work on getting the art created. Using our same example, let’s say that this order will use a yellow t-shirt and have use up to four screens. Black, tan, light blue and white. Let’s use Midjourney to help create the main image.
Now we want to create the stack of pancakes on a plate. It needs to be simple, and for our purposes here we want an illustration style that can be brought into Photoshop and separated later into four spot colors.
We’ve identifed that we want to use black, tan, light blue, and white as the ink colors for the shirt. According to the information in the order, we’ll be using a Jerzees Island Yellow 50/50 29MR t-shirt.
As you can see, it took a few tries to get something usuable. But, in the end, we have an image that we can use and it clocked in under four minutes of total time.
To use this art, we’ll need to push it through some software that will bump up the resolution. By default, Midjourney only sends out a 1024 x 1024 image at 72 dpi, which isn’t good enough to use on it’s own. There are other tools you can use, but I’ve found Gigapixel to be perfect for our use.
Here’s the image from Midjourney. It doesn’t have to be perfect and we can edit and play with colors in Photoshop.
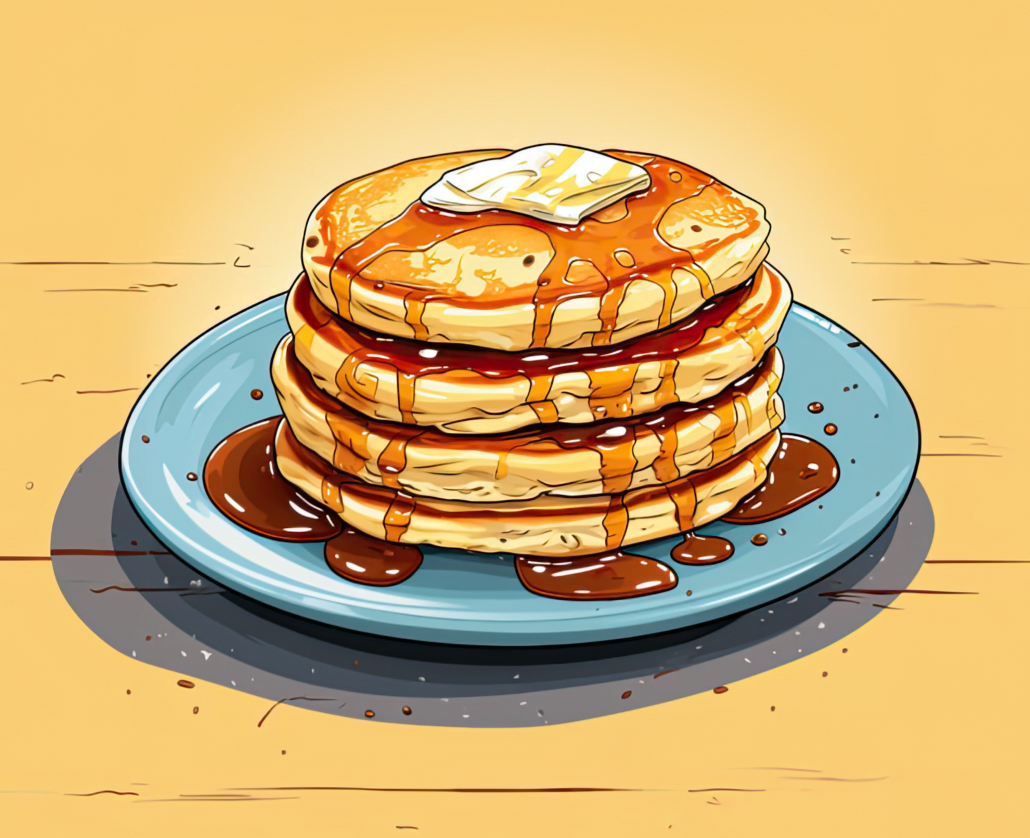
As of right now, we’ve spent about six minutes on this project. Two for the ChatGPT and the thumbnail, and about four minutes for the pancake image.
Now, let’s build the file.
Photoshop File Creation and Seps
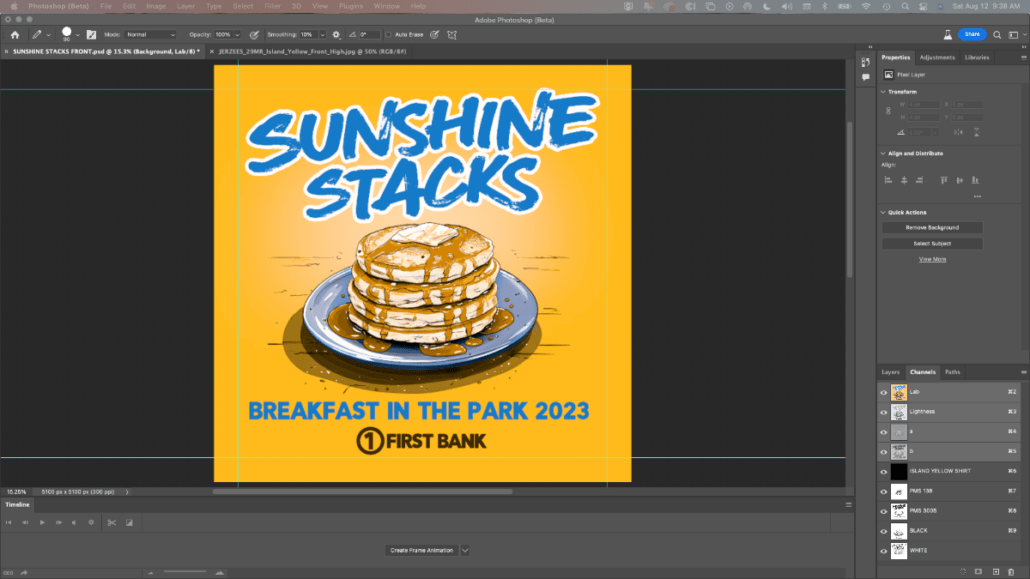
The Midjourney pancake image is brought into Photoshop. The text and sponsor logo are added and a little bit of time is spent making the basic pieces fit and look great. Pantone colors are chosen, and in this case, we’ll use Black, PMS 138, PMS 3005 and White.
This isn’t the final art separation file. It is in draft form, and we’ll need to color separate the file with the actual shirt color in mind, and knock this down into four spot colors.
Use the color picker tool to get the hex value of the garment, which in our case is #FEBA1B for a Jerzees Island Yellow 50/50 garment. This will help show the seps on the actual shirt color more closely.
Step-By-Step
Here’s how the steps where handled. Separating raster files for screenprinting is easy. You do not need to convert the files to vector, as that is a longstanding industry myth.
- Design the image 100% to size. In this case, see the example above. This is the state the image is in when we start the separation process.
- Convert the file to LAB. LAB gives you a lot of freedom in choosing underbase plates and other options. I always work out of LAB.
- You will be using Channels, not layers to do the separations. Layers will still be present and active, but Channels is where all of the action resides.
- In Channels, create a new Channel. Double click the thumbnail to bring up the Channel Spot Color Options palette. Double click on the color square and the Color Picker (Spot Color) tool will appear. Enter the hex value of the shirt color here. In our case for Jerzees Island Yellow it is #FEBA1B. Rename the Channel, “Island Yellow Shirt.”
- Each of our four spot colors will be created the same way. One method (not the only one, but the one used here) is to use the Color Range Tool to select colors found in the LAB image.
- Where the color is nearest or at 100% use the Color Range tool to select the color. Adjust the slider selection to grab the amount of the color you want. Once selected, click on the Create New Channel button. This will create a new Channel. Invert, and you will see your selection as a grayscale.
- Click the Channel thumbnail and repeat step 4 above, but use the appropriate color for what you have selected.
- It is ok if you don’t get everything you want in one pass. You can select other areas and make new Channels the same way. Use the Apply Image command to add them to the spot color Channels you’ve created. Use Multiply, and select your additional Channel you created to add the missing elements to your spot color Channels. You can add a percentage of what’s shown and control what is added easily.
- Use the Dodge and Burn tools to tighten up each plate. These either lighten or darken the halftones on each of the Channels.
- Once you are satisfied with the results, take a screen capture of the spot color channels. This is what you will send to your customer for approval is reflects exactly how the image will look on the shirt color.
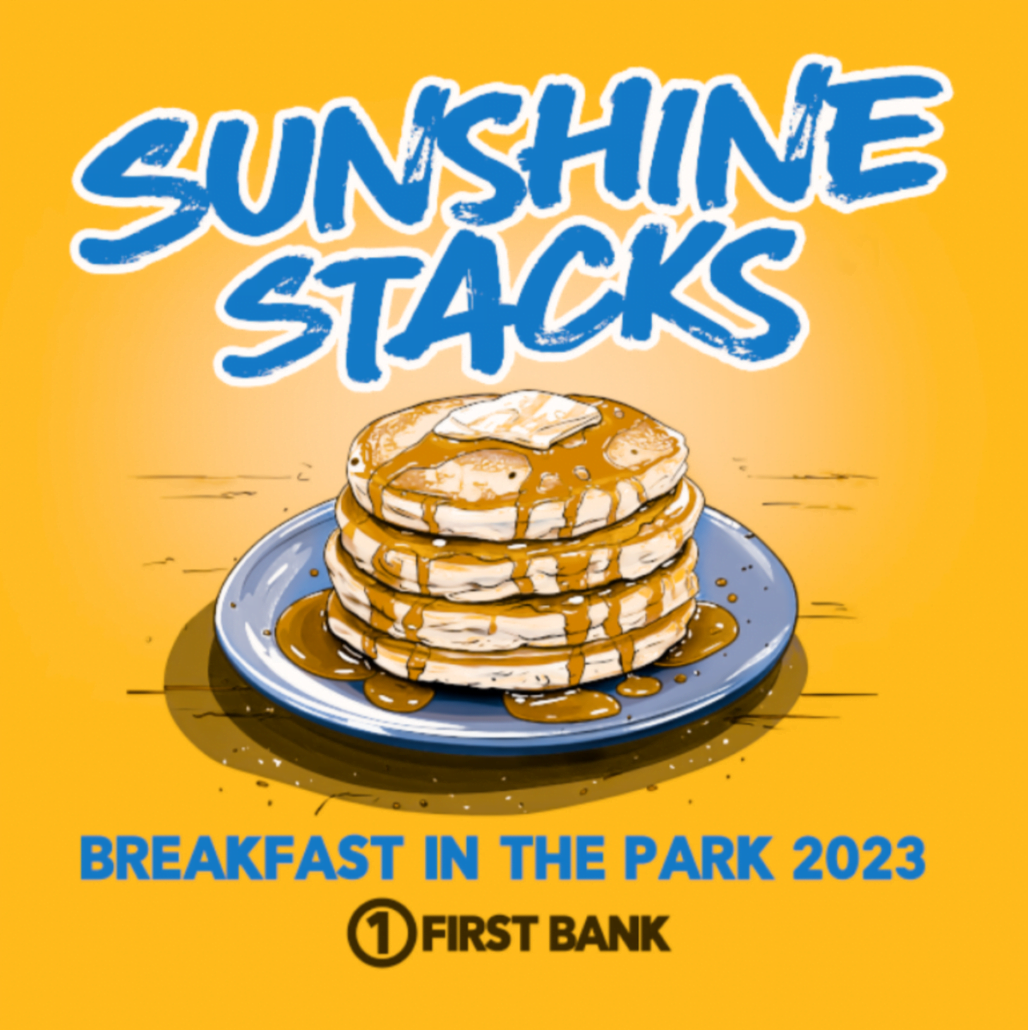
Once Approved, Separate the Channels
Once your customer approves the art, you can split the Channels to separate each plate. These can be output and are ready to print.
Here are each of the spot color plates, in the print order we’ll use on press:

Time is Money
Where the time savings for your art team originates is in the creation of the main image. By using thumbnails, the main chunks of the layout is created. All that is needed is the illustration of the pancakes.
For an artist to do this from scratch, that’s at least an hour project. Maybe more.
As shown, this art file was created from scratch using AI tools and separated in about twenty or thirty minutes. This is exactly why you should be considering adopting new methods in your art department workflow.
Tools like ChatGPT or Midjourney are not going to replace people. They are going to help them iterate and create faster. This is a competitive advantage.
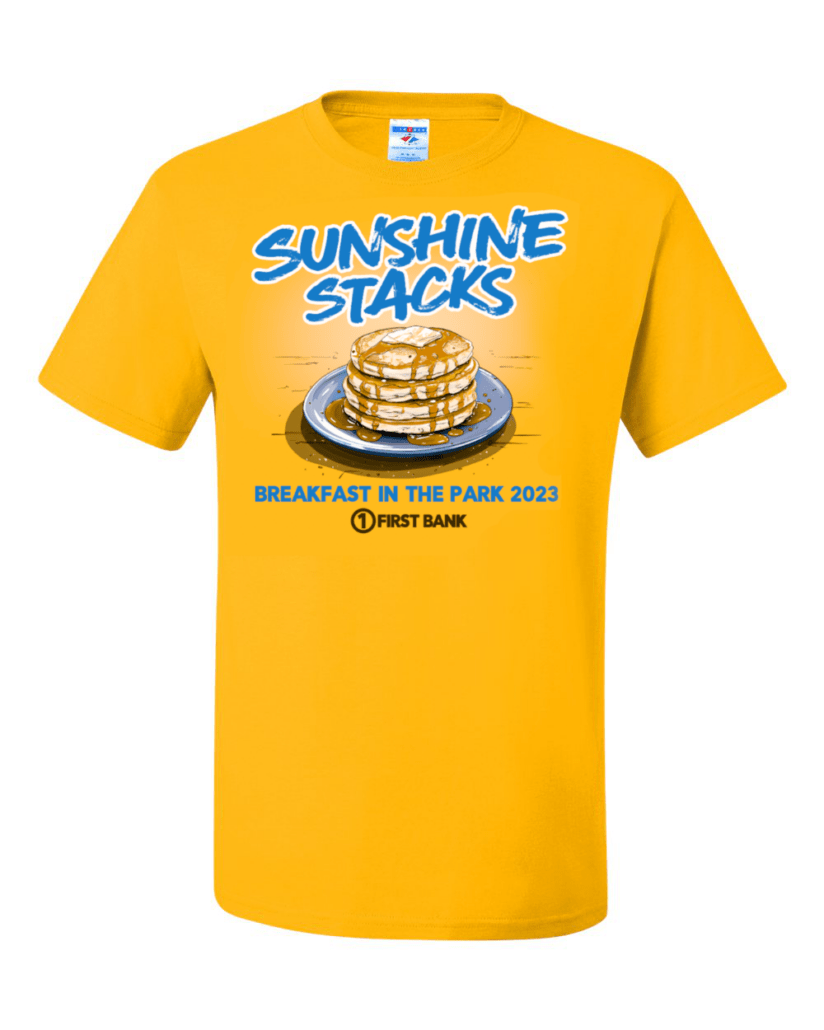
The art for the Sunsine Stacks event was completely designed and ready to use in a half an hour. This could have been also used for other media forms such as DTG, DTF, banners, displays, signage, or promotional items. The trick for using tools such as ChatGPT or Midjourney is to know how they work, how you are going to use them, and the techniques to get the output you want for the decoration method you employ in your shop.
Shameless Plug
Using Midjourney and getting fantastic results quickly can be elusive at times. Like anything, you have to learn how to use it.
I’ve started a weekly newsletter that is dedicated to sharing stories, tips, tricks, step-by-step instructions, and best practices with using Midjourney for print applications.
I’m keeping the cost low on purpose. It’s $12 a month.
If this article has piqued your interest, you should subscribe to the Midjourney Elevating Print Creativity Newlsetter today. Just click this button.
“Space and light and order. Those are the things that men need just as much as they need bread or a place to sleep.” – Le Corbusier
“Vision is the art of seeing what is invisible to others.” – Jonathan Swift
“I am not strong on perfection.” – Jasper Johns
Help Support This Blog
While I may be goofing around with AI for some projects, this blog and its contents have been created by me, Marshall Atkinson. I occasionally use AI tools such as Midjourney or OpenAI. Tools are meant to be used, and as a human being, I can control them.
Why am I writing this? To remind you, dear reader, these words are backed by a real person. With experience, flaws, successes, and failures… That’s where growth and learning happen. By putting in the work.
If you are reading this and it is not on my website, it has been stolen without my permission by some autobot. Please report this to me and/or publicly out the website that hijacked it. And if you are trying to copy and use it without my permission, you are stealing. Didn’t your mama teach you better?
If you like this blog and would like to support it, you can:
- Buy a book.
- Share this blog on your social media.
- Leave a comment! Engagement is fun.
- Join Shirt Lab Tribe.
- Subscribe to the Success Stories podcast.
- Watch and like an episode on the Jerzees Adventures in Apparel Decorating YouTube series.
- Get signed up for the new Production Tracker app.
- Subscribe to the Midjourney Elevating Print Creativity Newsletter
Also, my basic elevator pitch to you is that I help with “Clarifying effective change.” If you are dissatisfied with your business’s current results, maybe I can help.
Please schedule a discovery call here if you want to learn more.
Thanks!